Steps on How To Do Eye Makeup
Eye makeup is fun to apply and can really accentuate your eyes if applied correctly. Your mood and outfit can determine what look you want to achieve. Go for a dark, smoky eye in the evening or a fresh, fun vibe during the day. The look becomes uniquely yours when you get creative.
Don’t fret if you’re unfamiliar with which color goes where. Opt for purchasing an eyeshadow palette. Palettes usually have several different coordinating shades that blend well together and can create one or several looks.
Basic eyeshadow brushes are a girl’s best friend. These tools are needed to achieve the looks listed below. You’ll also need eyeshadow primer (optional, but highly recommended), eyeshadow shades of your choice, eyeliner, mascara, and/or false eyelashes.
Don’t let eye makeup intimidate you. We have compiled some simple tips to help create that perfect guise. Below you will find three different types of eye makeup looks. We are certain you’ll find one that you love!
The Neutral Eye
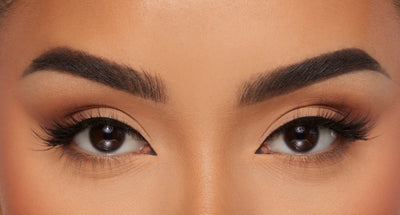
A day-to-day neutral eye look is simple to achieve. It flaunts a naturally polished look without appearing too over-done. Usually, daytime eyes boast neutral shades and earthy tones. Think beachy sand, clay, and river stones. To create this look, gather your tools and makeup, and let’s get started.
To create this look we want to brighten and lighten the eye area, while also creating definition.
- Apply eyeshadow primer all over the eye area from the eyelash base to the brow bone. Primer helps smooth the skin and helps prevent your eyeshadow from creasing.
- Apply a light nude color eyeshadow all over the eye area, from the lash line to the brow bone. This helps lock the primer in place and provides a nice base for the rest of your shadow.
- Grab a slightly darker neutral color and apply that all over the eyelid and blend it just above the crease. This creates some depth.
- Last, take an even darker neutral color and brush it into the crease and blend so that there is not a harsh crease line. You may use one shade darker than this one to accentuate the outer corner of the lid. This technique offers an additional definition. Be cautious not to use too dark of a color. This can tend to look too heavy for daytime wear.
-
Apply a dark brown or black liner to the upper lash line only. This will define the eye without closing it off.
Optional: Opt for a dark shade of shadow as a liner instead. Using an angled liner brush, gently brush the shadow into the lash line for a smokey-lined effect.
- Keep lipstick minimal with a light pink or nude color. This is perfect for day wear since it’s versatile and can match any casual outfit well. A bold red or darker hue works well with a neutral eye also for a more dressy look.
- Mascara and/or false lashes should be light and wispy for daytime wear.
The Smoky Eye
If a more dramatic look is your thing, then a smoky eye is perfect.
A smoky eye adds depth and mystery, while also yielding a smoldering, sultry vibe.
To create this look we want to focus on smudging smoky, darker shades of grays, blues, browns, and greens. Think granite, clay, and the deep blue sea.
While applying your darker shadows, it is possible for these shades to fall out onto your under-eye area or cheeks. This can create smudging or the illusion of undereye circles.
To prevent this, use an eye primer. Also, make sure to tap excess shadow off of your brush before applying it. If these tips still don’t work, gently brush off the shadow fallout and use a dab of concealer if necessary to cover the affected area.
To create your smoky eye follow these steps:
- Apply eyeshadow primer all over your eye area from the eyelash base to the brow bone. Remember that primer helps to smooth the skin and prevents your eyeshadow from creasing.
- Choose a matte light/medium shade of gray, brown, or khaki and brush all over the eyelid up into the brow bone. This shade should not be super dark. You’ll be adding darker shades in the following steps.
- Create a gradient smoky effect by choosing a darker color for your lid. Start by applying the color directly to the center of the eyelid and gradually dab it outward, allowing the shade to lessen in intensity the further out you get. Apply this shade on the lid and just a bit outside of the crease area.
- Select a coordinating darker shade for the crease color. This color should be one or two shades darker than your all-over shade. Create dimension by applying this color with a blending brush into the crease of the lid, working outward to the corner. Apply in layers and blend. You should have a blended gradient effect with your crease being the darkest color of all. Make sure to blend enough, you don’t want any definite lines or patchiness. This could cause your cosmetic creation to look more like a black eye than a smoky eye.
- Add a bit of highlighter to the inner corners of your eyes and to the brow bone to give a glowing light effect.
- Apply a smudged liner to the upper and lower lash lines. You may also brush a gunmetal-colored shadow over the lower lashline to add a smudged metallic look.
- Keep lips minimal with nude shades.
- Mascara and/or false lashes should be full of volume in order to offset the dramatic shadow.
The Bold and Glam Eye
If you’re feeling fun and bold, the glam eye is for you. Select your favorite coordinating bright colors. Think yellows, pinks, bright blues, greens, and purples. Let’s do this!
- Apply your eyeshadow primer from the lash line to the brow bones to assure even shadow coverage.
- Apply the lightest shade you’ve chosen to use and brush it all over the lid and up into the brow bone.
- Choose one bold color (whichever is your favorite), and apply it to the lid and blend slightly upwards allowing the shadow to become lighter. Keep the shade just above the crease, not much further. The most color concentration should be on your lid. Smooth out any harsh lines. You want to use one bold color instead of several. Using several bold colors at once, unless expertly applied, can tend to look juvenile.
- Smudge the same bright color you used on your lids, underneath your eyes as your eyeliner, and opt-out of the upper liner. If you want to skip the all-over eyeshadow and simply go with a bold colorful liner, that’s an excellent statement look all by itself.
- A light gloss or nude lip works best with bright, bold eyes.
- Mascara and/or falsies can be bold or minimal with this look. It’s up to you.
Lashes Vs. Falsies
Both mascara and falsies are amazing inventions. Sometimes it’s difficult to know which to choose. Let’s take a look into the possibilities.
Mascara
Most of us like the dark, dramatic look that mascara gives our natural less-than-bold lashes. Mascara tends to be a staple in most of our cosmetic bags because of the oomph it yields.
We go through tubes upon tubes of the stuff in hopes of finding “the one”. The one that steps in and sweeps us off our feet with its volume, length, curl, you get the idea. We tend to either be in a long-term affair with our favorite mascara or on a continuous hunt in hopes of finding something better.
False Lashes
Sometimes even the boldest mascara can’t provide us with enough fabulousness. We need more, and lots of it! That’s when false lashes sweep us into a true fringe romance.
Magnetic eyelashes are a steady companion, providing exactly what you want when you want it. The faithful fluttery length, and va-va-voom volume with no surprises - all the glam. It’s enough to keep our heart’s content.
So if false lashes are your choice affair, then it’s important to get to know them and how they work. Magnetic lashes are a safe alternative to both salon lash extensions and at-home lashes that require glue for adhesion.
This is because magnetic liner doesn’t contain the harsh chemicals that lash glue does. Harsh chemicals can cause irritation, redness, and infection if improperly applied, or if you have an allergic reaction.
Conclusion
Glamnetic has created magnetic lashes for every look, every eye shape, and every occasion.
Take our lash quiz to find out which set of lashes is right for you.
The most important thing to remember is to have fun. If you like the look you create, then flaunt it! Be adventurous, try something new. You’ll be glad you did!
Sources:
8 thoughts on “Colour Theory for Makeup Artists” | Hair and Makeup Artist
Neutral Colors. What defines a neutral color? The Realm of Color | Medium
Is Magnetic Eyeliner Safe to Use on Your Eyes and Face? | Healthline


