


Ultimate Guide for How to Do Makeup

When it comes to applying makeup, there aren’t many rules. You don’t have to be a pro to apply makeup like one, but there’s some basic know-how.
Makeup should accentuate your natural beauty, not cover it up. There are steps you can take to make sure that your cosmetics are applied properly to create a flawless look that’s totally you.
Steps on How to Do Makeup
First things first, always begin with a clean, moisturized palette (AKA face). Your face needs to be clean for makeup to cling properly to your skin. Moisturizer is important because it creates a hydrated canvas, which means your makeup will glide on easily.
Once your skin is clean and moisturized, you’re ready to begin your artwork.
Step 1: Apply a Primer
Primer isn’t one of those things that you absolutely have to use, but it does make a pretty big difference if you do. Primer primes your skin for an even makeup application.
Primer minimizes the appearance of pores and imperfections. It also controls oil production and helps your makeup last longer.
Primers come in gels, creams, and serum-like consistencies. Read the labels to find which one will work best with your skin type.
Usually, primer is applied to your entire face. Just a little bit goes a long way, so don’t cake it on. Allow it to absorb into your skin for about a minute, then move on to the next step.
Step 2: Apply Foundation
Foundation comes in liquid, powder, cream, and mousse forms. Which type you like is based on preference, although your skin type can impact it, too.
For those of you with oily and combination skin, opt for an oil-free, non-comedogenic liquid or powder foundation. Dry skin should wear a more moisture-rich foundation.
Make sure your foundation matches your skin tone. To test a shade, apply a pea-sized amount of foundation right at your jawline and blend it into your skin. If the color blends well between your lower face and jawline, then you have your perfect shade. If not, go lighter or darker, depending on your skin tone.
If you still aren’t sure, visit your local makeup counter or salon. They usually have a makeup artist on hand that can guide you in choosing the perfect shade for your skin tone.
Step 3: Apply Concealer
Concealer is one of those things that you either need or you don’t. It’s great for covering blemishes, skin discolorations, and under-eye circles.
A little bit goes a long way. You’ll just apply concealer to the places that you need to conceal. Blend it well with your finger or a beauty blender sponge.
The concealer shade should blend well with your foundation and should not be a visibly different color.
Step 4: Apply Blush
Apply your fave blush with a round, fluffy makeup brush. To make sure you’re placing it on the apples of your cheeks, look into the mirror and smile. The part of your cheeks that pops out is where you should apply your blush.
Don’t overdo it. Apply just enough blush to replenish the natural flushed color of your cheeks.

Step 5: Contour & Highlight
This step is optional, but it makes a big difference if you choose to do it, trust us. The key to remember when contouring and highlighting is that darker colors recede and add depth. Lighter, shimmery colors accentuate and bring forward.
When you contour, follow your own natural face shape. To chisel out your cheeks, apply contouring right underneath your cheekbones. If you want a more sculpted-looking jawline, apply your contour shade along your jawbone. Make sure you blend well to avoid having a dark area at your jawline.
Highlighter should be applied at the tops of your cheekbones, brow bone, inner corners of your eyes, and down the top of your nose. If you want the look of a plumper upper lip, apply a bit of highlighter to your cupid's bow.
Step 6: Set it With Powder
Set your look with a translucent setting powder. This will help your makeup stay put and absorb oils that can make your skin look oily.
Choose a translucent powder for a natural-looking finish.
Step 7: Fill Your Brows
Think of your eyebrows as the frame to your face; they are important. It’s time to make sure that those brows are on fleek.
This step is recommended if you have thin or sparse eyebrows. Choose a pencil, powder, or tinted gel that is close to your natural hair color.
If you choose to fill in your brows, add your color in sparse places. These spots may be where the tiny hairs are thinner, or you just need a little more pigment in those areas. Always apply it in the direction your hair grows.

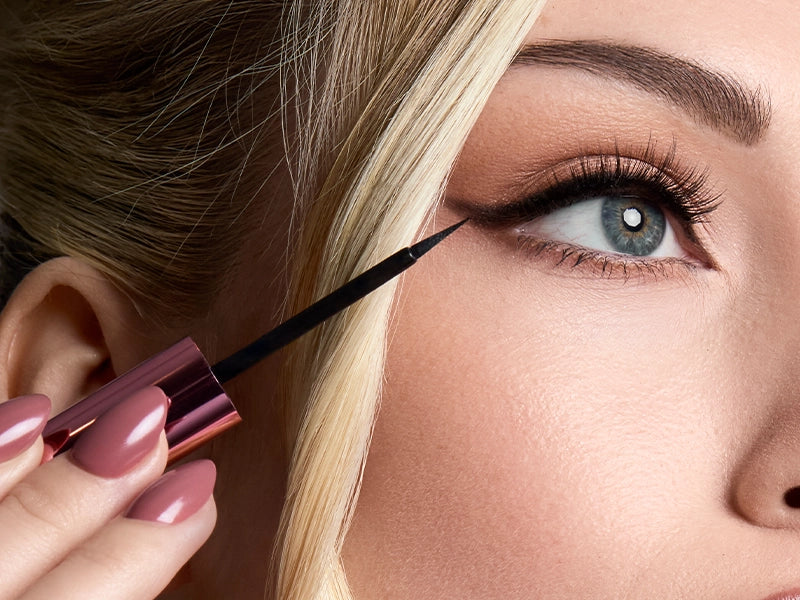
Step 8: Apply Eyeliner
Eyeliner can be in pencil form, gel, and liquid. It comes in a lot of fun colors, so choose one that you love and line your upper and lower lash lines.
Be careful to apply it gently. You don’t want to tug your eyelids or apply too much pressure.
Create a winged effect on your upper lash line for a fun, dramatic look.
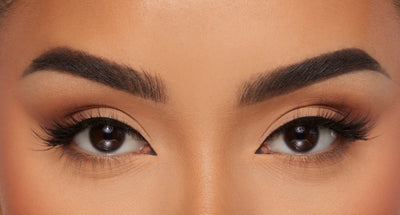
Step 9: Apply Mascara or Faux Lashes
Mascara and falsies can really make your eyes pop in a fantastic sort of way. It’s up to you as to whether you want to wear mascara, falsies, or both.
Mascara usually comes in black or brown colors. Occasionally you can find blue, green, or some other wild color. False lashes come in black and multi-colors for a fun vibe also.
Step 10: Apply Lip Color
First, line your lips in a color that either matches your natural lip color or the shade of lipstick you will be applying.
Line around your natural lip line, and continue to apply the lip liner into the center of your lips. This will help your lipstick last longer.
Lipstick can be found in glossy, matte, and liquid varieties. Choose your shade and apply it all over your lips inside the lip line.
If you want a natural look, simple lipgloss will do the job. Lipgloss will moisturize your lips and add a nice luxe shine.

To Sum it Up
Makeup can enhance your natural beauty and give you a boost in confidence. It is fun to apply if you know the basics.
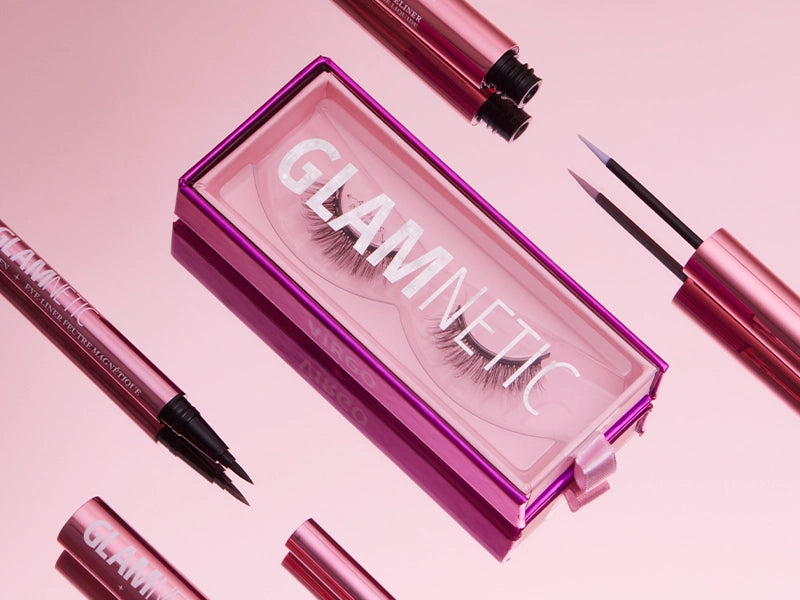
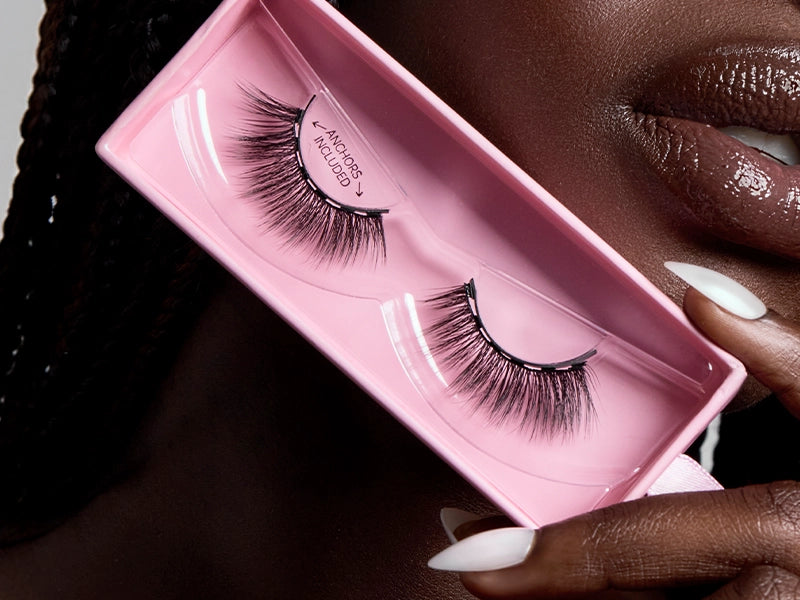
We at Glamnetic have designed voluptuous faux magnetic lashes to help make your lash application and removal simple. Simply apply the magnetic liner and lashes and go. When you’re ready to remove them, pull them gently off from the outer corner inward. They are waterproof and reusable. Yes, we thought of everything. ;)
If you make a mistake during your makeup application and need a quick fix, try the Oopsies On The Go disposable makeup remover swabs. They fit perfectly in your purse for those quick touch-ups. Soo Clean makeup remover pens are perfect for erasing mistakes too.
Go get your makeup out and explore new colors and techniques. It’s fun, and who knows? You just may learn a new trick or two for yourself.
♡SUBSCRIBE BELOW FOR 15% OFF YOUR GLAMNETIC PURCHASE!♡
Sources:
What Does Makeup Primer Actually Do? And Do We Need It? | HuffPost
The 8 Main Types of Foundations, Demystified Here are the basics | Byrdie
What Is the Difference Between Primer, Foundation, And Concealer? | Style Craze

